Friday, January 27, 2023
{BYSHC} Blog- Challenge #29 in a Mini-slimline
Friday, January 13, 2023
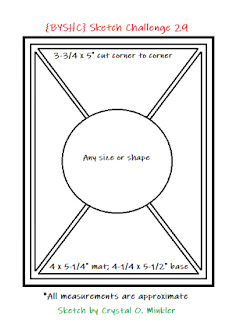
{BYSHC} Sketch #29 for January!
The {BYSHC} Blog Challenge is continuing with Sketch #29 for January. Once I got the hang of how easy this was to make in doubles, I created a few different sets of cards!
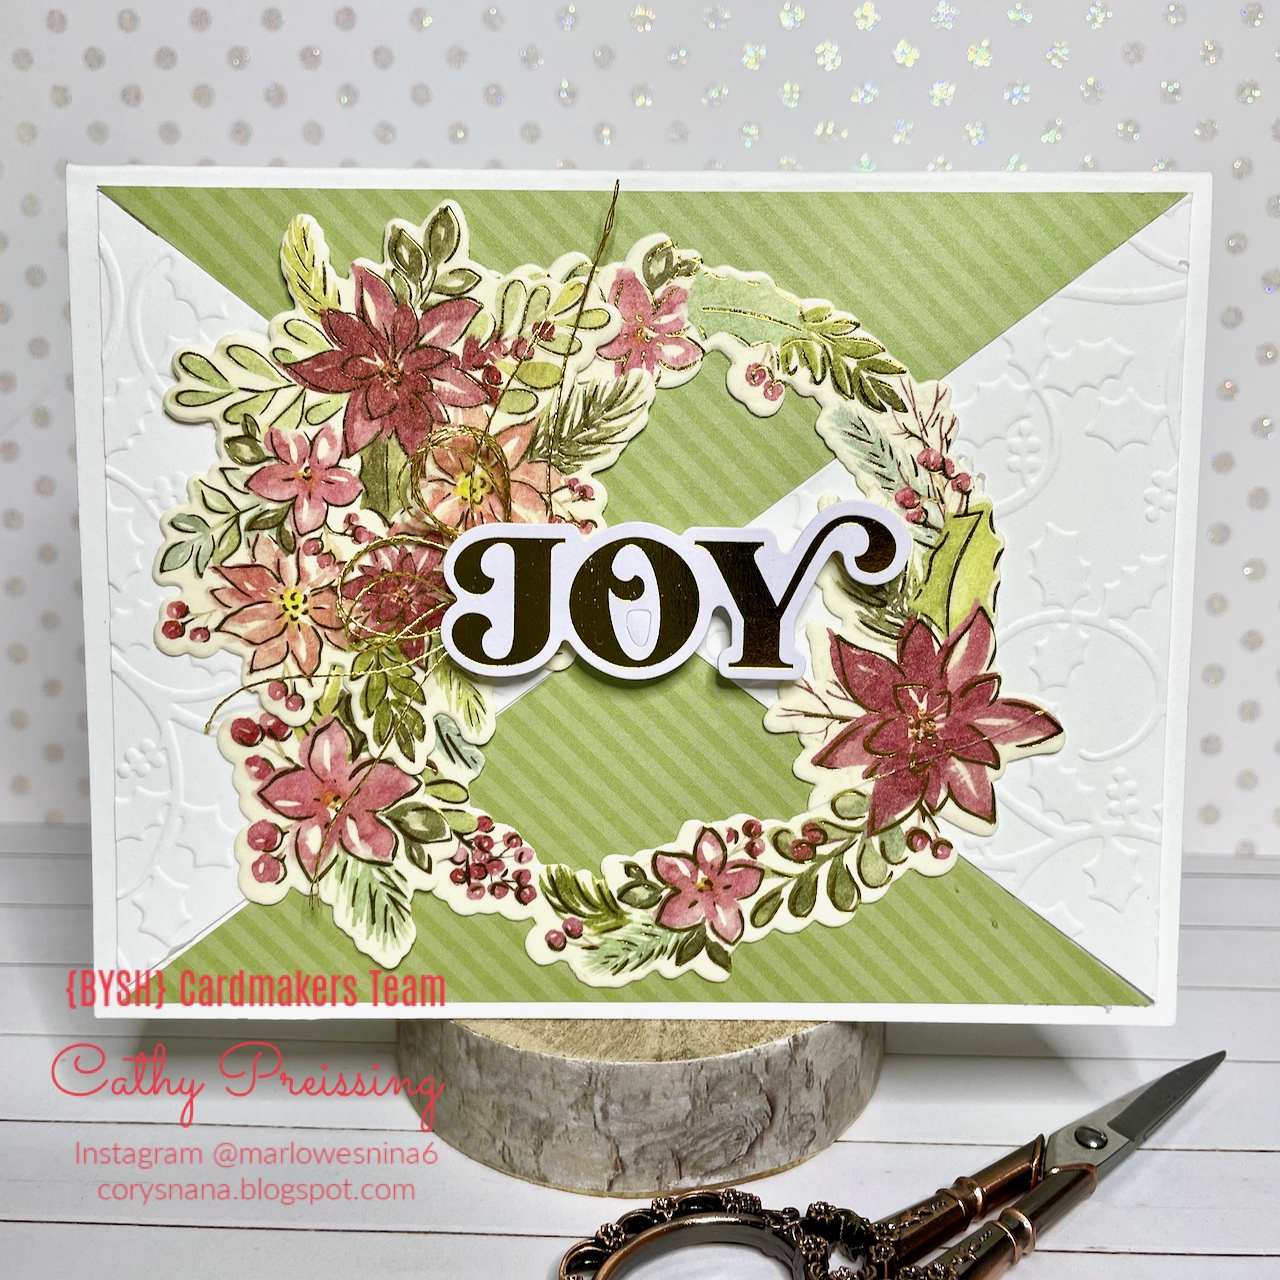
For this card, I turned the sketch on its side and decided to keep Pinkfresh's Poinsettia Washi Tape set the "star of the show". I die cut it using a an off-white cardstock and then went to my scrap drawer for the green striped paper. I paired it with Taylored Expressions' Holly embossing folder to add texture, but keep it simple with color. I layered the extra Poinsettia washi tape flowers over the wreath, To finish the card off, I popped on a Pinkfresh foiled Holiday sentiment with some gold thread behind it.
I hope you keep playing with us this month. All you have to do is add your card to Sketch #29's Album in the {BYSHC} FB group to be eligible for this month's prize!! Thanks for stopping by my blog.
Wednesday, January 11, 2023
Thanks, Jennifer McGuire! Using Products & Color Inspiration
Jennifer McGuire shared a wonderful video this week with tips about keeping the joy in crafting. A couple of things she talked about that resonated for me - using supplies you have and actually sending the cards to people. I tend to be a collector rather than a user of my purchases. I have a healthy stash of stamping products and papers, so today, I spent some time in my craft room taking on some of her suggestions. Today's card uses a variety of Papertrey Ink products I have in my stash, including Vase Collection 14 stamp and die from their December release.
One of the things Jennifer shared was product called Color Cube to help with color choices. I love the idea of these color card because I often struggle with color choices. Using her inspiration, I figured I could use my patterned papers as a resource for colors. I went digging and found the floral My Mind's Eye paper you see in the background of the photo. Knowing I wanted to splatter my card, I looked at my Distress and Distress Oxide inks for matches. I brought out A Little Sketchy Stencil Collection and Mix & Mat Snowflake Die to use behind the floral arrangement. I splattered with a variety of accent colors.I also found an old (very old) piece of SU! patterned paper for the gray paper/main card base, which I used with Papertrey's Tin Stitched Border Die for visual interest. I finished the card with a bit of ribbon from my stash, some Pinkfresh pearls and a die cut word "you".
Thursday, January 5, 2023
Let's Craft & Create - January 2023 Challenge/Black & White
When I read the "Black & White" optional theme for the Let's Craft & Create Blog challenge this month, I immediately thought of a stack of black and white patterned papers I've had in my stash for years! Additionally, I am trying to beef up my stash of "everyday" cards just so I can drop folks a line when the occasion arises.
I started with a bold "hello" sentiment from Joy Clair Designs' Such A Blessing Digital Stamp set. The thing I love about digital stamps is my ability to adjust the size of the image. I sized the word and angled it to fit with the MFT Stitched Scallop Basic Edges Die-namics die.
CAS cards are not my usual style, so my eye looks to add some visual interest, which I did using an embossing folder for the white portion of the card. A little buffer over the sentiment before I ran it through my machine helped soften the embossing detail.
Friday, December 30, 2022
{BYSH} Cardmakers Sketch #29 - Card #2
Back for a second time with the BYSH Cardmakers December sketch. Using Pinkfresh Studio's Poinsettia Washi tape, die, and foiled sentiments makes this a quick card to put together.
Friday, December 16, 2022
{BYSH} Cardmakers Sketch #29
Back with my first {BYSH} Cardmakers post for Sketch #29 today.
I chose to use four different papers from my stash and turned the sketch horizontally to fit the focal image. I love this ornament shape! It's called Winter Scene Ornament framelits with stamps from Sizzix/Lisa Jones collection. (I got it on sale at Hobby Lobby and can't find an online link, so I wonder if it's just sold there.) It's a great set! I used all of the dies and stamps on my card. I love the size of the ornament and know I can get lots of use from it!There is still plenty of time to play along with this month's sketch. Post your card in the album for Sketch #29 in the BYSH Cardmakers FB group for your chance to win this month's prize! Thanks for stopping by my blog.
Friday, November 25, 2022
{BYSHC} November - Sketch Challenge #28
Wednesday, November 9, 2022
Glittering Poinsettias - Joy Clair Designs
I love the wreath and the tree, but as I looked more carefully at the images, I thought the candle would challenge my coloring when it came to adding color, shading, and dimension to the candle. Plus, I loved the look of the poinsettias - and knew right away I wanted to use the "out of the box" die cutting technique with it. It's an oldie-but-goodie technique. If you are unfamiliar with it, take a peek at this tutorial from 2013!!
I started with the die cut circle and then colored the image with my Copic markers. I underpainted the green leaves with blue in the shaded areas, so when I decided to keep my poinsettias white, I used blue for their shading.
I knew I needed a colored backdrop to help the white poinsettias pop and instead of coloring with Copics, I used Distress Oxide inks. I masked the candle/poinsettia and blended some Speckled Egg with Hickory Smoke distress oxides for most of the background. I used Scattered Straw with Mustard Seed for the behind the candle's flame. Next, while the image was masked, I splattered white and brown inks. Finally, I painted the poinsettia's white leaves with craft glue and sprinkled Distress Clear Rock Candy Glitter over them to add some sparkle!
With all of that done, it was time to finish the card. As I went through my paper collection, I knew I wanted the image to be the focal point and loved how the green ties in with the ink blending and green leaves. The black tied in with the poinsettia outlines! I just found a scrap of gold foil and the card base was done! I added the sentiment, a few clear gems, and popped the candle out on foam. I love how this one turned out!
As I was designing this card, I have a feeling Sketch #28 from the Build Your Stash Holiday Cardmakers came into play! I always love a good sketch!! Thanks for stopping by my blog. In kindness, Cathy Challenges Entered:
Saturday, November 5, 2022
Let's Craft and Create - November Challenge
This month's Let's Craft and Create Challenge is to be inspired by a sketch. I LOVE sketch challenges because they often spark the creative process for me. One of my favorite sketch challenge blogs from a few years ago was Sweet Sunday Sketches. I loved the designers and fun sketches. My card captured some of the simplicity of one of their last sketches before the blog closed in 2015 with sketch #300.
This card was a Tim Holtz extravaganza!! I tried to capture a multimedia look using some of his stencils, ink blending, and stamps for the background. It's finished off with lots of white splatter using diluted acrylic paint. The image is Tim's Stamper's Anonymous Snarky Cats with extras from his Things/Talk clear stamp set. Lots of fussy cutting went into this card, but I love how it turned out.
Friday, November 4, 2022
{BYSHC} - Sketch Challenge #28
The main circle of November's Build Your Stash Holiday Cardmakers sketch #28 is a great for featuring an image.
For my mini-slimline take on the sketch, I started with a Gina Marie Designs Candy Cane Stripe 6x6 stencil and some Stickles Glitter Gel- Mars instead of ink blending.Joy Clair Digital Stamps and Foiling!
I am back with my first Joy Clair Designs post for November. Regular blog followers know I have been on a foiling kick. I didn't think much about foiling digital stamp images until I saw the Jingle All the Way digital stamp set's bold sentiments in the new Merriest Moments release.
They seemed perfect for foiling!! Problem for me - my home printer is an inkjet printer, which is great for Copic coloring, but not the right ink for foiling with my Mini-Minc and supply of Decofoil; it needs toner ink. So, I printed my designs on paper at home and took one more step by taking them to a local store for copying, using Toner ink. 30 cents later, I brought them home and started foiling!! It was super easy!
My Process:
-
It's finally here! The first day of the Build Your Stash Holiday Cardmakers Christmas in July 2026 Linky Party! If you have been with u...
-
This card is a bit of a two-for-one challenge for me! The theme for Challenge #522 at Addicted to Stamps & More is Christmas , and ano...


.jpg)


.jpg)